How to Improve Your First Touch in Soccer: Drills, Tips & Techniques
A great first touch can transform your game overnight. It wins you time and space, makes your passing sharper, and turns tight situations into easy decisions. It is also one of the most trainable skills in soccer — you do not need a team, a coach, or expensive equipment. A wall and a ball is enough to get started.
This guide covers everything: what first touch actually means, the key technique points every player needs, solo and partner drills at every level, how to control aerial passes, the mistakes most players make, and how today’s elite players use first touch to dominate the game.
—
What Is First Touch in Soccer?
First touch refers to the very first contact you make with the ball when receiving a pass. Every time the ball comes to you — whether it rolls along the ground, drops from the air, or arrives at pace — your first touch sets up everything that follows.
A good first touch moves the ball into a position where you can immediately pass, shoot, dribble, or shield. A poor first touch puts you on the back foot, forces an extra touch, and gives defenders the chance to close you down and win the ball.
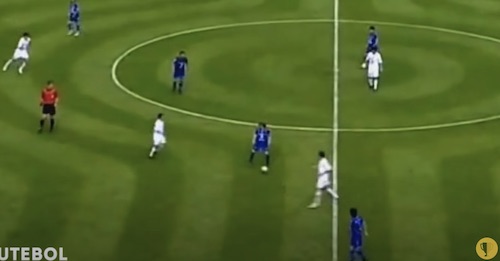
At the youth level, the difference between players is often raw ability. At the high school and college level, and certainly in professional soccer, the gap comes down to technical skill — and first touch is at the top of that list.
Watch how Cesc Fabregas — one of the most technically gifted midfielders of his generation — masters first touch in this breakdown:
—
Why First Touch Is the Most Important Skill in Soccer
You can have excellent vision, speed, and shooting technique. But if your first touch is poor, none of those qualities get to show up.
Here is why first touch matters so much:
It creates time and space. A sharp first touch that moves the ball away from a closing defender gives you an extra half-second to look up and make your next decision. That half-second is the difference between a good pass and a turnover.
It dictates the speed of play. Teams that pass and move quickly — think of Barcelona at their peak, or Manchester City today — can only do that because every player controls the ball in one clean touch and immediately plays it on. Kill the ball under your feet and the whole rhythm collapses.
It reduces pressure. When you control the ball away from the defender and into space, the defender has to restart their run. A poor touch that leaves the ball under your feet means they are already on you before you can play.
It multiplies every other skill you have. Your passing, shooting, and dribbling all start from the moment you receive the ball. If that moment is clean, every skill that follows becomes easier.
Christian Pulisic described it well: “It’s knowing which direction to take your first touch — not just receiving it. A lot of times it’s not about stopping the ball under your foot and having no options. It’s putting yourself in a good position for what you want to do next.”
—
The 3 Fundamentals of a Good First Touch
Before you start drilling, get these three things right. They apply to every surface, every height, every speed of pass.
1. Body position before the ball arrives
The biggest mistake players make is waiting passively. By the time the ball reaches you, your body should already be angled toward where you want to play next. Scan the field before the pass comes. Know where your nearest defender is. Know your next option. Then position your body so your first touch moves the ball in that direction.
Stay on your toes — never flat-footed. Weight on the balls of your feet means you can adjust in a split second as the ball takes a bounce or swerves.
2. Locked ankle, soft touch
When controlling a fast pass, lock your ankle (firm, not floppy) and angle the receiving surface slightly back to absorb the pace of the ball. Think of it like catching an egg — you give a little on contact so the ball does not bounce away from you.
For slower passes where you want to push the ball forward into space, the action is more of a push than a cushion.
3. First touch out in front, not under your feet
This is the most common technical error at every level. Players stop the ball directly under their feet, which means they need a second touch just to move it into a useful position. Instead, your first touch should place the ball two to four feet in front of you — out of your feet and into the space where you can play.
Watch Pedri, Jude Bellingham, or Lamine Yamal receive a pass. The ball never dies under their foot. It moves — into space, away from pressure, ready for the next action.
Here is Southampton technician Sofiane Boufal demonstrating how to get the ball under instant control, with coaching cues from Coerver Coaching:
—
First Touch Drills to Practice Alone
You do not need a training partner to build a great first touch. These solo drills are the foundation.
Wall passing drill (the single best drill for first touch)
Find a flat wall and a hard surface. Stand about five to eight yards back.
1. Pass the ball firmly against the wall with the inside of your right foot.
2. As it returns, control it with the inside of your right foot, moving the ball slightly to your right.
3. Pass again immediately.
4. After 20 reps, switch to your left foot.
5. Progress by hitting the wall harder — exaggerate the pace so the return is difficult to control. In a game, any pass that comes to you will feel easier by comparison.
As you improve, add direction: alternate controlling to the left and to the right so you practice a directional first touch away from imaginary pressure.
Aim for 15–20 minutes per session. Do this five days a week and the improvement in four weeks will be dramatic.
Outside foot and sole control
Repeat the wall drill but now practice:
– Controlling with the outside of your foot and pushing the ball diagonally
– Using the sole (bottom of foot) to stop and roll the ball in a new direction
– Receiving with one foot and immediately transferring to the other
Players who can only use the inside of their dominant foot are predictable and easy to defend. Work all surfaces of both feet.
Juggling for first touch
Juggling is not just a trick — it is one of the most direct ways to train your touch. Every time the ball drops from above and you bring it under control with a foot or thigh, you are replicating aerial first touch situations.
Start with simple foot juggling. Progress to:
– High-low juggling: alternate one touch above shoulder height, one touch below the waist
– Thigh-to-foot alternating
– Tennis ball juggling — a smaller ball demands much finer touch and concentration
Try juggling a tennis ball with your weaker foot for five minutes a day. It will feel impossible at first. Stick with it.
Cone control drill
Set up two cones about four feet apart directly in front of you. Pass the ball against the wall and try to control it back through the gap between the cones with your first touch. The cones simulate the feet of a defender closing you down.
As you improve, tighten the gap.
—
First Touch Drills with a Partner
Once you have the basics from solo work, training with a partner adds pressure and decision-making — the two things that make first touch difficult in a real game.
Hard pass and control
Stand 10–15 yards apart. Your partner passes the ball to your feet as hard as they can — almost like a shot at your feet. Your job is to control it with one touch, moving it two to four feet in a specific direction.
Progress by calling out the direction just before the pass: “left” or “right.” You must control the ball in that direction, simulating receiving while a defender is approaching from one side.
Pressure close-down drill
Your partner plays the ball in and immediately sprints to close you down. You receive, take a first touch away from the pressure, and play the ball back before they reach you.
This drill trains decision-making under stress — exactly what happens in a game.
Through-the-cones receiving
Set up two small cone gates about three feet wide, one to your left and one to your right. Your partner plays hard passes to your feet. You control the ball through one of the gates with your first touch. Your partner calls which gate after the ball leaves their foot so you have to react quickly.
This builds the directional first touch that separates good players from great ones.
Turn and play
Your partner stands behind you and passes the ball to your feet. You have a choice: control and turn, or lay it back and spin into space. A third player (or a cone) represents the defender. This drill builds awareness of when to turn and when to play it simple — a decision that comes down to your first touch quality and what position it puts you in.
—
How to Control Every Type of Pass
A complete first touch means being comfortable with the ball from any height and any angle. Here is how to approach each surface.
Inside of the foot (ground passes)
The inside of the foot is the largest and most reliable surface for controlling ground passes. Angle your foot to cushion the ball or redirect it. This is the starting point for all first touch work.
Outside of the foot
Use the outside when the ball is slightly away from your body and you want to push it forward without breaking stride. Lamine Yamal uses this constantly — one outside-foot touch that simultaneously controls the ball and sets him into his dribble.
Sole (bottom of foot)
The sole is useful for stopping the ball dead when you need to change direction sharply or protect the ball under pressure. Roll it back and turn in one motion rather than stopping and then moving — this saves a precious touch.
Thigh
For balls dropping from mid-height, use the flat of your thigh to cushion the ball down to your feet. Keep your thigh roughly parallel to the ground, angled slightly back to absorb pace. The ball should drop softly in front of your kicking foot.
Chest
For high passes and clearances, use the chest to redirect the ball down to your feet or out into space. Arch slightly back on contact and then come forward to direct the ball. Keep your arms out for balance, not to handle the ball.
Head
In tight situations near your own goal or when pressed high, heading to control rather than clear is a useful tool. Angle your forehead to direct the ball down to a teammate rather than simply heading it away.
—
How Elite Players Use First Touch
Watching elite players is one of the best teaching tools available. Look specifically at what they do before the ball arrives, not just when it arrives.
Jude Bellingham is one of the best examples in the modern game. Watch how he scans the field two or three times before receiving. By the time the ball arrives, he already knows exactly where his first touch will go. His control rarely takes the ball under his feet — it moves immediately into the direction he has already decided on.
Pedri is the current gold standard for one-touch control in tight spaces. In central midfield, he receives the ball with defenders inches away and consistently takes a first touch that gives him a passing angle. It looks instinctive but it is the result of thousands of hours of repetitive training.
Lamine Yamal, who is covered in depth on this site (https://soccer-training-info.com/lamine-yamal-soccer-skills/), has an extraordinary ability to control the ball at pace with the outside of his foot while simultaneously setting himself into a dribble. His first touch is his first move — not two separate actions.
Bernardo Silva at Manchester City is another great study. His top 10 first touches show the full range — ground passes, aerials, tight space receptions — all controlled instantly and placed perfectly for the next action:
The common thread: all of them have scanned, decided, and body-positioned themselves before the ball arrives. The touch itself is almost automatic.
—
Common First Touch Mistakes (and How to Fix Them)
Mistake 1: Standing flat-footed
What happens: The ball arrives and you are not ready to adjust your body position. The control is off-balance and the ball either goes under your feet or bounces away.
Fix: Get on the balls of your feet every time the ball is played. Stay active, not still. Even a small bouncing movement keeps your body ready.
Mistake 2: Ball dies under your feet
What happens: You kill the ball directly underfoot, which requires a second touch to move it anywhere useful. A defender closes you down.
Fix: Practice the wall drill with the explicit goal of moving the ball two to three feet in front of you on every first touch, never under your body.
Mistake 3: Watching the ball, not the field
What happens: You focus entirely on controlling the ball and have no awareness of what is around you. By the time the ball is controlled, a defender is already pressing.
Fix: Force yourself to scan before each pass during training drills. Make it a habit that becomes automatic.
Mistake 4: Wrong surface for the situation
What happens: Using the inside of the foot for a ball that would be better handled with the thigh, or using the chest for a ball that is actually receivable at foot level.
Fix: Train all surfaces deliberately. Do not only practice ground passing in your wall sessions — include deliberate thigh and chest work every session.
Mistake 5: Not locking the ankle
What happens: A loose, floppy ankle means the ball glances off at an angle. This is especially common in young players receiving hard passes.
Fix: Before every wall drill, consciously lock your ankle — tighten the foot, point the toe slightly. Feel the difference between a firm surface and a loose one.
—
First Touch Drills for Youth Players
For younger players (U8–U12), the approach should be fun and high-repetition rather than technical and drill-heavy. The goal at this age is simply to get comfortable with the ball.
U8–U10: Just juggle
Give every player a ball and let them juggle. Count touches. Set personal bests. Let them experiment. This is the most direct path to touch development at young ages — and it can happen at home, in the garden, or in a bedroom with a soft ball.
U10–U12: Wall passing basics
Introduce the wall drill with inside-of-foot control. Keep the pace gentle to start. The goal is for players to feel what it means to control the ball out in front of them rather than under their feet. Use colored cones to mark the target zone where the ball should land after the first touch.
U12–U14: Directional touch games
Small-sided games (3v3, 4v4) in tight spaces force players to take quick directional first touches or immediately lose the ball. The constraint of the small space does the teaching naturally. Coaches can add a rule: first touch must move the ball in a new direction before you pass.
All ages: Play wall, not phones
The single biggest thing a young player can do to improve their first touch is to use any spare time with a ball against a wall. Five minutes a day is enough to build feel and confidence over a season. Encourage this explicitly. Players who develop their skills informally, on their own, are almost always more technically gifted than those who only train in organized sessions.
—
Frequently Asked Questions
How long does it take to improve your first touch?
With consistent daily practice — even 10–15 minutes against a wall — most players see noticeable improvement within 3–4 weeks. Significant transformation takes a full season of regular training.
Can you improve first touch without a partner?
Yes. Wall drills and juggling are the two most effective first touch exercises, and both require only a ball. A rebound net is a useful alternative to a wall if no flat wall is available.
What foot surface is best for controlling the ball?
The inside of the foot is the most reliable surface for ground passes. For aerial passes, the thigh and chest are most commonly used. Over time, work toward being comfortable on all surfaces — inside, outside, sole, thigh, and chest.
What is a directional first touch?
A directional first touch moves the ball away from a defender rather than simply stopping it. Instead of controlling the ball where you receive it, you use your first touch to push the ball into space, away from pressure, in the direction you want to go. This is one of the six essential moves every soccer player should develop.
Should I practice first touch with my weaker foot?
Absolutely. Players who can only use their dominant foot are easy to defend because opponents can simply force them onto their weak side. Practice wall drills and juggling equally with both feet from the very beginning.
What makes a professional’s first touch different from an amateur’s?
Two things: preparation and precision. Professionals scan constantly before the ball arrives so they know exactly where their first touch will go before it gets there. And through repetition, their touch is precise — the ball lands exactly where they intend it to, not roughly in the right area.
—
Start Today
The good news about first touch is that improvement is almost entirely in your hands. You do not need a coach watching you, a full team, or a training facility. You need a ball, a wall, and fifteen minutes.
Start with the basic inside-foot wall drill. Hit it hard. Control it out in front. Do 500 reps today. Come back tomorrow and do it again. Within a month, every pass that comes to you on the field will feel easier to handle — and you will already know what to do with it before it arrives.
For more skills work, check out the ball control guide (https://soccer-training-info.com/controlling_the_soccer_ball/) and the full range of soccer skills drills (https://soccer-training-info.com/soccer_skills_drills/) on this site. If you want to see first touch in action at the highest level, the Lamine Yamal skills breakdown (https://soccer-training-info.com/lamine-yamal-soccer-skills/) is a great place to start.